
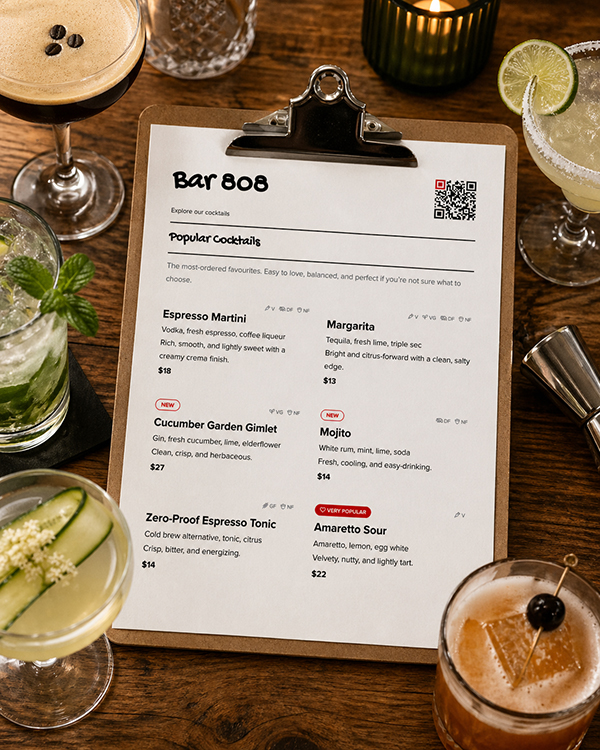
Printing your own restaurant menus can save money, reduce waste, and give you much more control when prices, specials, dishes, drinks, or seasonal menus change.
If you have already used Happy Menu to create a print-ready PDF, the hard design work is done. You do not need to start from scratch in Canva, Adobe, or an AI menu maker every time your menu changes. You already have a clean, structured, branded menu that is ready to print.
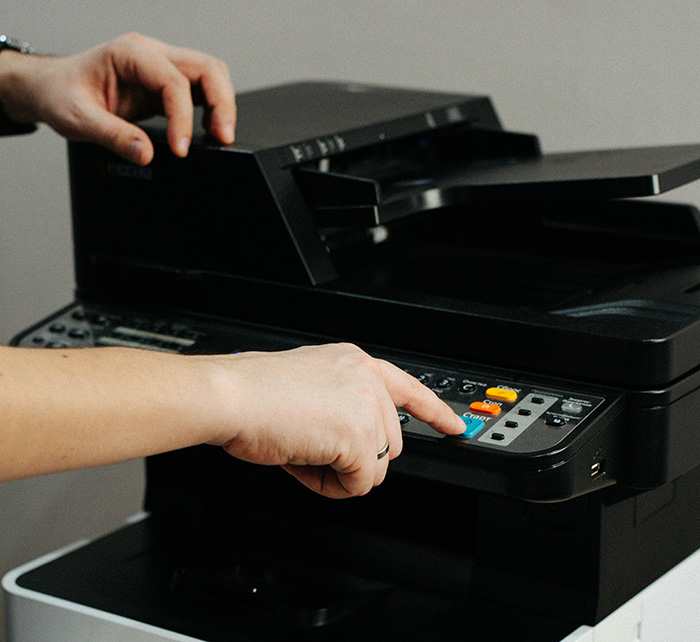
The next question is simple: how should you print it?
You have three main options. You can print the PDF at a local print shop, print it yourself in-house, or use a professional online menu printer. The right choice depends on how often your menu changes, how many copies you need, how premium you want the menu to feel, and whether you want laminated, disposable, or insert-style menus.
Why Print Your Own Restaurant Menus?
Restaurants change constantly. Prices change. Ingredients change. Specials change. Suppliers change. A dish sells out. A lunch menu becomes a dinner menu. A cocktail list gets updated. A takeout menu needs a new QR code. A happy hour offer changes before the weekend.
If every small menu change requires a designer, a new file, a print quote, a production wait, and a full reprint, menu updates become expensive and slow.
Printing your own menus gives you more control. You can update your Happy Menu, download the latest printable PDF, and print only what you need.
For small restaurants, cafes, bars, diners, food trucks, and takeout shops, this can be a big advantage. You do not always need 500 professionally printed menus. Sometimes you need 10 fresh table menus before dinner service, 20 updated takeout menus for the weekend, or 5 new laminated drink menus because the old ones were damaged.
Start With the Right PDF
Before thinking about printers, paper, or laminators, make sure your PDF is ready for the type of menu you want to print.
A good restaurant menu PDF should have clear sections, readable fonts, strong contrast, accurate prices, enough spacing between items, and a layout that matches the way customers actually read menus.
Happy Menu helps because your menu is structured before it becomes a PDF. Your categories, items, prices, descriptions, dietary tags, branding, and QR codes are already organized. That means your printed menu is not just a static design file. It is generated from the same menu system that powers your online menu and QR menu.
Before printing, check these details:
- Are all prices correct?
- Are sold-out or removed items hidden?
- Are spelling and descriptions correct?
- Are dietary labels accurate?
- Does the QR code scan properly?
- Is the menu the right size for your printer?
- Do you need single-sided or double-sided printing?
- Do you want to laminate it?
Always print one test copy before printing the full batch.
The Best Menu Sizes for US Restaurants
For the US market, the most practical restaurant menu sizes are based on standard paper sizes.
Letter size: 8.5″ x 11″
Our menus use Letter Size. This is the easiest size for most restaurants. It works with almost every home office printer, small business printer, laminator, clipboard, menu holder, and display stand.
Best for:
- Dine-in menus
- Takeout menus
- Cafe menus
- Drink menus
- Daily specials
- Table menus
- Laminated menus
For most small restaurants, letter size is perfect. It is cheaper, easier, and more flexible.

Should You Print Menus In-House or Use a Print Shop?
There is no single right answer. The best choice depends on your menu type.
Use a local print shop when you need quality but not equipment
If you do not want to buy a printer, the easiest option is to download your Happy Menu PDF and upload it to a local print shop, office supply store, or copy center.
This is a good option if you only print menus occasionally, do not want to manage ink or toner, or need a better print finish than your current printer can produce.
You can still save money by laminating the menus yourself. Printing the pages at a shop and laminating them in-house is often much cheaper than paying the shop to print and laminate every copy.
Print in-house when your menu changes often
If you update your menu regularly, an in-house setup can pay for itself quickly.
This is especially useful for restaurants that change specials, prices, happy hour menus, drinks, takeout options, or seasonal dishes. Instead of waiting for a print order, you can print a fresh batch whenever you need it.
Use professional menu printing for large stable runs
Professional menu printing can be the best choice when you need a large quantity of menus that will not change for a while. Bulk printing often has a much lower per-menu price, especially for takeout menus, flyers, and folded menus.
The downside is flexibility. If your prices change two weeks later, those printed menus may become outdated.
Inkjet vs Laser: Which Printer Is Better for Restaurant Menus?
The biggest printing decision is whether to use an inkjet printer or a laser printer.
Inkjet printers
Inkjet printers are usually cheaper to buy upfront. They can produce good color, especially for photos and graphics. However, cheap cartridge-based inkjets can become expensive if you print a lot, because replacement ink cartridges are often costly and run out quickly.
Inkjet printers can be a good choice if you only print small batches, want rich color, and are using the printer regularly enough that the ink does not dry out.
Best for:
- Very small menu batches
- Menus with photos
- Restaurants that already own a good inkjet printer
- Occasional printing
- Ink tank printers with low running costs
Be careful with cheap cartridge inkjets. They can look affordable at the start, but the ink cost can make each menu more expensive than expected.
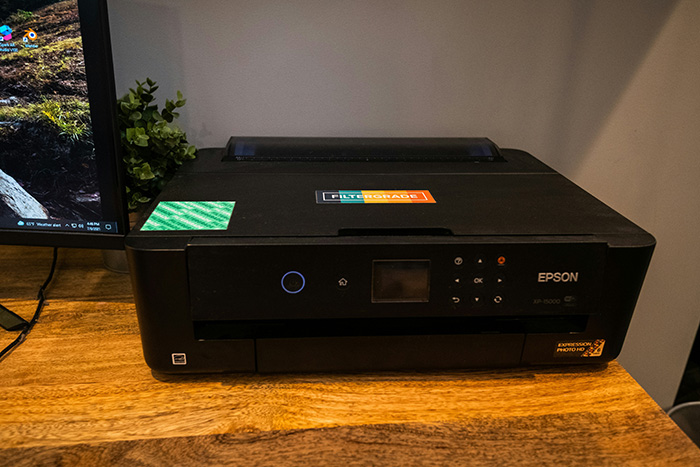
Ink tank printers
Ink tank printers are still inkjet printers, but they use refillable ink tanks instead of small cartridges. They usually cost more upfront than cheap inkjets, but the running cost can be much lower.
For a small restaurant that wants good color and low ongoing ink costs, an ink tank printer can be a sensible middle-ground option.
Best for:
- Restaurants printing menus weekly
- Small batches of color menus
- Takeout menus
- Specials and seasonal menus
- Menus with photos or colorful branding
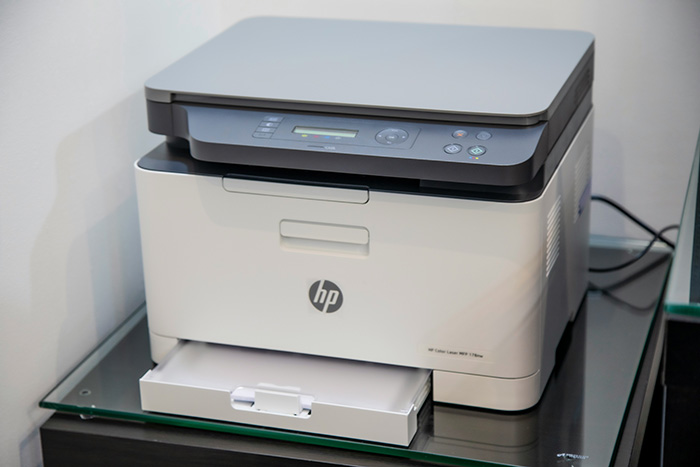
Laser printers
Laser printers usually cost more upfront, but they are fast, reliable, and excellent for sharp text. Toner does not dry out like ink, which is useful in a restaurant environment where printing may happen in bursts.
For most restaurants printing text-heavy menus, a color laser printer is often the best long-term choice. It is fast, consistent, and better suited to regular business printing.
Best for:
- Frequent menu printing
- Sharp text-heavy menus
- Fast reprints before service
- Menus with simple branding and limited photos
- Restaurants that want low-maintenance printing
If your menu relies heavily on food photography, a good inkjet or ink tank printer may produce richer photo results. If your menu is mainly text, prices, sections, and branding, laser is usually more practical.
Recommended Printer Setups by Budget
Budget setup: Use a local print shop and laminate yourself
This is the cheapest way to get started without buying a printer.
You need:
- Your Happy Menu printable PDF
- A local print shop or office supply store
- A basic letter-size laminator
- Letter-size laminating pouches
- A paper trimmer or scissors
This setup is ideal if you want professional-looking prints but do not want to manage a printer in-house. You can pay the shop to print your PDF, then laminate the menus yourself to reduce finishing costs.
Starter in-house setup: $150 to $300
This setup is suitable for a small restaurant that prints occasional menus, specials, and takeout sheets.
You need:
- A decent color printer
- Letter-size paper or light cardstock
- A basic laminator
- 3 mil or 5 mil laminating pouches
- A paper trimmer
This setup can work well if you are printing small batches. The main risk is buying a cheap printer that costs too much to run. Always check replacement ink or toner prices before buying the printer.
Better in-house setup: $300 to $600
This is the sweet spot for many restaurants.
You need:
- A color laser printer or ink tank printer
- Automatic double-sided printing if possible
- A 9-inch or 13-inch laminator
- 5 mil laminating pouches
- 65 lb or 80 lb cover stock, or quality 32 lb text paper
- A proper paper trimmer
This setup is good for restaurants that print menus every month, every week, or whenever prices and specials change.
Premium in-house setup: $600 to $1,200+
This setup is for restaurants, restaurant groups, catering businesses, bars, or cafes that print frequently and want more professional control.
You need:
- A business-grade color laser printer or high-quality ink tank printer
- Higher paper capacity
- Reliable duplex printing
- Support for heavier paper stock
- A 13-inch laminator for larger menu sizes
- A guillotine-style paper cutter
- A corner rounder for a more polished finish
- Optional menu covers, clipboards, or table stands
This is the right setup if you want menu production to be part of your regular restaurant workflow.

What Paper Should You Use for Restaurant Menus?
Paper choice affects how your menu feels, how it prints, how long it lasts, and whether your printer can handle it.
In the US, paper is often sold by pounds, such as 32 lb text or 80 lb cover. In many other countries, paper is described in gsm, or grams per square meter. Both systems describe paper weight, but they are not always obvious to compare.
Everyday paper: 24 lb to 32 lb text
This is heavier than standard copy paper and works well for simple menus, specials, and inserts.
Best for:
- Daily specials
- Menus that change often
- Takeout inserts
- Temporary menus
- Menus that will be laminated
If you are laminating the menu, you do not always need very thick cardstock. The lamination adds stiffness and durability.
Light cardstock: 65 lb cover, about 175 gsm
This is a good practical choice for restaurants. It feels sturdier than regular paper but is still manageable for many office printers.
Best for:
- Dine-in menus
- Laminated table menus
- Drink menus
- Specials menus
- Menus placed in holders
Medium cardstock: 80 lb cover, about 215 gsm
This gives a more premium feel and works well for menus that customers handle regularly.
Best for:
- Premium dine-in menus
- Menus that are not laminated
- Menus in clipboards or menu covers
- Menus with heavier branding
Before buying a full pack, check whether your printer supports 80 lb cover stock. Some printers handle it well. Others may jam or refuse to feed it properly.
Heavy cardstock: 100 lb cover, about 270 gsm
This feels premium, but it is not always the best choice for in-house printing. Many standard printers struggle with paper this thick.
Best for:
- Professional print shop menus
- Unlaminated premium menus
- Menu covers or inserts
- Small specialty cards
If you plan to laminate your menus, 100 lb cover may become too stiff. For laminated menus, lighter paper or 65 lb cover is often easier to handle.
Should Restaurant Menus Be Laminated?
Lamination is useful for menus that are handled repeatedly. It protects against fingerprints, spills, grease, moisture, and tearing.
For dine-in table menus, laminated menus are usually a good idea. For takeout menus, flyers, inserts, or menus customers take home, lamination is usually unnecessary.
3 mil lamination
3 mil lamination is thinner and more flexible. It is cheaper and works well for menus that need some protection but do not need to feel rigid.
Best for:
- Light-duty menus
- Temporary menus
- Specials
- Menus that change often
5 mil lamination
5 mil lamination is a strong everyday choice for restaurant menus. It feels more durable than 3 mil but is not as stiff as 10 mil.
Best for:
- Dine-in menus
- Drink menus
- Table menus
- Menus handled by many customers
10 mil lamination
10 mil lamination is very sturdy. It can feel premium, but it is more expensive and may be too rigid for everyday restaurant menus.
Best for:
- Counter menus
- Outdoor signs
- Bar menus
- Menus that need extra durability
For most restaurants, 5 mil is the best balance of cost, durability, and feel.
What Equipment Do You Need?
You do not need a full print shop to print your own restaurant menus. A basic setup can be simple and affordable.
Essential equipment
- A printer or access to a local print shop
- Letter-size paper or cardstock
- A laminator
- Laminating pouches
- A paper trimmer
- A clean, flat surface for trimming and finishing
Helpful extras
- Corner rounder
- Menu holders
- Clipboards
- Table tents
- QR code table cards
- Microfiber cloth for cleaning laminated menus
- Storage folder for extra printed menus
A corner rounder is optional, but it can make laminated menus feel more polished. Sharp laminated corners can feel cheap and may catch on surfaces, so rounded corners are worth considering if customers handle the menus often.
How to Print Your Happy Menu PDF Step by Step
Step 1: Download your printable PDF
Start by downloading the latest print-ready PDF from Happy Menu. Make sure you are using the newest version of your menu, especially if you recently updated prices, specials, descriptions, or availability.
Step 2: Open the PDF and check the layout
Open the file before printing. Check that the menu looks correct, the text is readable, the QR code appears clearly, and the page size matches your paper.
Step 3: Choose the right print settings
When printing, look carefully at the print settings. Choose actual size or 100% scale if the PDF is designed for your paper size. Avoid shrinking the menu unless necessary, because small text becomes harder to read.
Use high quality or best quality for final menus. Use draft mode only for test prints.
If printing double-sided menus, make sure the page flips on the correct edge. Print one double-sided test before printing the full batch.
Step 4: Print one test copy
Never print the full batch first. Print one copy, check it under real restaurant lighting, and scan the QR code with your phone.
Check:
- Is the text large enough?
- Are prices easy to read?
- Are category headings clear?
- Does the QR code scan?
- Are margins correct?
- Does the paper feel right?
- Is the color too light or too dark?
Step 5: Print the full batch
Once the test looks good, print the number of copies you need. For restaurants, it is often better to print smaller batches more often instead of printing too many menus at once.
For example, if you need 30 table menus, print 35 or 40. Keep a few extras for replacements, but do not overprint if your menu changes regularly.
Step 6: Let the prints dry or cool
If using an inkjet printer, let the pages dry before laminating. If using a laser printer, let the sheets cool and flatten for a moment before feeding them through the laminator.
Step 7: Laminate the menus
Place each menu inside a laminating pouch with even borders. Feed it into the laminator sealed edge first. Keep the menu straight as it enters the machine.
Do not rush this step. A crooked pouch can ruin the menu or jam the laminator.
Step 8: Trim if needed
If the laminated border is too large, trim it carefully. Leave enough sealed edge so the lamination does not peel open. A paper trimmer is much cleaner than scissors.
Step 9: Round the corners
If you have a corner rounder, use it after trimming. Rounded corners make laminated menus look more professional and feel better in the customer’s hand.
How Much Can Restaurants Save?
The biggest savings usually come from short runs and frequent updates.
If you need 500 takeout menus that will not change for months, a professional printer may be cheaper per piece. But if you need 20 to 50 updated dine-in menus, drink menus, specials menus, or laminated table menus, printing your own can save a lot of money.
Example: 25 laminated table menus
Let’s say you need 25 letter-size laminated table menus.
If you pay for professional lamination at around $1.99 per letter-size pouch, lamination alone could cost about $49.75 before printing.
If you laminate them yourself using pouches that cost about $0.15 each, the pouch cost for 25 menus is about $3.75.
That is a difference of about $46 on lamination alone for one small batch.
After that, your main costs are paper, ink or toner, and your time. Once you already own the laminator, every future menu update becomes much cheaper.
Example: 50 laminated menus
For 50 laminated menus, professional lamination at about $1.99 each would be about $99.50 before printing.
DIY pouches at about $0.15 each would cost about $7.50.
That is about $92 in potential lamination savings on a single 50-menu refresh.
This is why a basic laminator can pay for itself quickly. If your restaurant updates menus even a few times per year, the savings can add up.
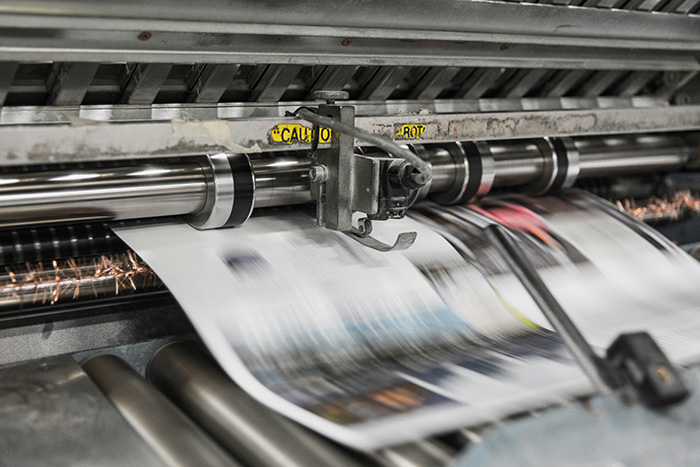
Where professional printers still win
Professional printers can be very cost-effective for large runs, especially for takeout menus, flyers, and folded menus. If you need hundreds or thousands of menus and the menu will stay the same for months, professional printing can make sense.
Professional printers also offer finishes that are hard to reproduce in-house, including synthetic paper, heavy cardstock, commercial coatings, folded menus, waterproof materials, and premium trim options.
The smart approach is not always “print everything yourself.” The smart approach is to use the right method for the job.
Best Printing Strategy by Menu Type
Dine-in table menus
Best option: print in-house or print locally and laminate yourself.
Use letter-size paper, 65 lb cover stock, or quality 32 lb text paper. Laminate with 5 mil pouches for durability.
Daily specials menus
Best option: print in-house.
Use 24 lb to 32 lb text paper. Lamination is optional. If the specials change daily, do not overbuild the menu. Keep it simple and replace it often.
Drink menus
Best option: print in-house and laminate.
Drink menus get handled often and may be exposed to spills. Use 5 mil lamination or place the printed menu inside a reusable menu holder.
Takeout menus
Best option: professional printing for large quantities, in-house printing for small updates.
If you need 500 or more takeout menus, a professional printer may be cheaper. If you need 25 updated takeout menus with a new price, QR code, or offer, print them yourself.
Happy hour menus
Best option: print in-house and laminate if reused.
Happy hour menus often change. Print small batches and update them whenever the offer changes.
Outdoor menus
Best option: professional printing or heavy lamination.
Outdoor menus need more durability. Regular home lamination may not hold up well in heat, sunlight, rain, or heavy handling. For outdoor use, consider synthetic paper, waterproof stock, or professional signage.
Common Mistakes to Avoid
Printing too many menus at once
If your menu changes often, do not print hundreds of copies just because the per-piece price looks cheaper. A cheap menu becomes expensive if it is outdated before you use it.
Using paper that is too thick for your printer
Heavy cardstock can feel premium, but it can also jam standard printers. Always check your printer’s supported paper weight before buying cardstock.
Using glossy paper with the wrong printer
Not all glossy paper works with all printers. Inkjet glossy paper and laser glossy paper are different. Using the wrong paper can cause smearing, poor print quality, or printer problems.
Laminating before checking the QR code
Always scan your QR code before laminating the full batch. A bad QR code on 50 laminated menus is an avoidable mistake.
Using tiny fonts
A printed menu needs to be readable in real restaurant lighting. Customers should not have to squint. Print a test and read it at a table before committing to a batch.
Cutting the laminated edge too close
If you trim too close to the paper, the lamination can separate. Leave a sealed edge around the menu.
How Happy Menu Makes Printing Easier
Happy Menu is built to make restaurant menus easier to manage everywhere: online, on QR codes, and in print.
Instead of redesigning a menu file every time something changes, you update your structured menu once. Your sections, dishes, prices, descriptions, dietary tags, and branding stay organized. Then you can generate a fresh printable PDF whenever you need it.
This gives restaurants a better workflow:
- Update the menu once
- Keep the online menu accurate
- Keep QR codes connected to the latest menu
- Download a print-ready PDF
- Print only the menus you need
- Reduce outdated menus and wasted print runs
That is the real benefit. Happy Menu does not just help you create a nice-looking menu. It helps you manage one accurate menu system across every place your customers see it.
Final Recommendation
- Use Happy Menu to create your printable PDF
- Print on letter-size paper
- Use 32 lb text paper or 65 lb cover stock
- Use a color laser printer or ink tank printer if printing in-house
- Use 5 mil laminating pouches for dine-in menus
- Print small batches instead of overprinting
- Use professional printing only for large stable runs
For most small restaurants in the US, the best starting setup is simple:
If your menu rarely changes and you need hundreds of takeout menus, use a professional printer. If your menu changes often and you need fresh table menus, specials, drinks lists, or QR menus, printing your own can save money and give you much more control.
The goal is not just to print cheaper menus. The goal is to keep your menu accurate, flexible, professional, and easy to update.
With Happy Menu, your printable PDF is already ready. All you need is the right printing setup for your restaurant.
FAQ
Can I print my restaurant menu at home?
Yes. If your menu is available as a print-ready PDF, you can print it at home or in your restaurant using a suitable printer. For best results, use good-quality paper, print one test copy first, and consider laminating menus that customers will handle repeatedly.
Is inkjet or laser better for restaurant menus?
For most text-heavy restaurant menus, a color laser printer is usually more practical because it is fast, sharp, and reliable. Inkjet printers can produce richer photos, but cheap cartridge inkjets can become expensive to run. Ink tank printers can be a good middle-ground option for restaurants that want color and lower ongoing ink costs.
What paper weight should I use for restaurant menus?
For laminated menus, 32 lb text paper or 65 lb cover stock is often enough because the lamination adds durability. For unlaminated menus, 65 lb or 80 lb cover stock gives a sturdier feel. Very heavy cardstock may not work with every printer.
Should I laminate restaurant menus?
Lamination is a good idea for dine-in menus, drink menus, table menus, and anything customers handle often. It protects against spills, fingerprints, grease, and tearing. For disposable takeout menus or daily specials, lamination is usually unnecessary.
What thickness of lamination is best for menus?
5 mil lamination is the best everyday choice for most restaurant menus. It is more durable than 3 mil but not as stiff as 10 mil. Use 3 mil for temporary menus and 10 mil for menus or signs that need extra durability.
Is it cheaper to print menus yourself?
It can be much cheaper for short runs and frequent updates, especially if you laminate menus yourself. Professional printing may be cheaper for large batches of takeout menus, but in-house printing gives you more flexibility when prices, specials, and dishes change often.
Should I use a professional printer for restaurant menus?
Use a professional printer when you need a large quantity, premium finishes, folded menus, synthetic paper, or menus that will not change for a while. Print your own menus when you need small batches, fast updates, or lower-cost replacements.
Can I print menus from a PDF?
Yes. A PDF is one of the easiest formats for printing because it preserves the layout. Happy Menu creates a printable PDF so restaurants can print their menu in-house, send it to a local print shop, or upload it to a professional printer.