How to Set Up a Digital Menu Board for Your Restaurant
Learn how to set up a digital menu board for your restaurant using Happy Menu, a TV, a Windows mini PC, HDMI, and Google Chrome. Create custom screens, control transitions, show your full menu or selected categories, and display your live menu on any restaurant TV.
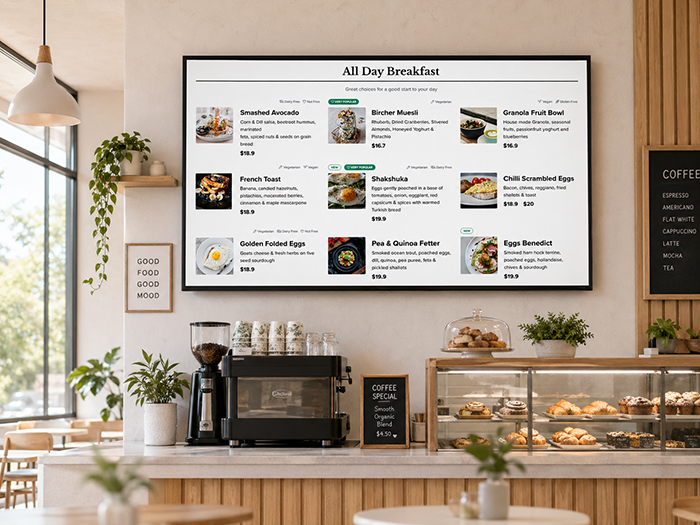
A digital menu board is one of the easiest ways to make your restaurant menu look more professional, easier to read, and easier to update. Instead of printing new posters every time you change prices, add specials, or update categories, you can display your menu on a TV screen and control it from your Happy Menu dashboard.
Happy Menu makes this simple. Inside your dashboard, you can create different screens, choose what each screen shows, configure transition times, decide whether to display the full menu or a single category, and get a unique URL for each screen.
Once your screen URL is ready, you open it in Google Chrome on a small computer connected to your TV. The page automatically lays out your menu for the screen. Put Chrome into fullscreen mode, and your restaurant has a live digital menu board.
The Simple Version
The recommended Happy Menu setup is:
- A TV or monitor
- A small Windows mini PC
- An HDMI cable
- Google Chrome
- A keyboard and mouse for setup
- Your Happy Menu screen URL
Connect the mini PC to the TV with HDMI, open your Happy Menu screen URL in Chrome, press fullscreen, and leave it running during service.
Why Happy Menu Uses a Screen URL
A traditional digital signage system can be complicated. You may need special media players, signage subscriptions, upload tools, design templates, or third-party apps. Happy Menu works differently.
Each digital menu board screen in Happy Menu has its own URL. That URL controls what appears on the screen. You can open it in Chrome, and the menu board is displayed directly in the browser.
This makes the setup easier for restaurants because there is no complicated design software to learn. Your menu data is already in Happy Menu. The screen simply displays it in a TV-friendly layout.

What You Can Configure in Happy Menu
In your Happy Menu dashboard, you can create different screen configurations depending on how your restaurant wants to display its menu.
Create Different Screens
You can add multiple screens inside your dashboard. Each screen can have its own settings and its own unique URL.
For example, a cafe might create one screen for coffee and breakfast, another screen for lunch items, and another screen for specials. A bar might create one screen for food, one for cocktails, and one for happy hour offers.
Display the Full Menu or One Category
You can choose whether a screen displays the full menu or only one selected category.
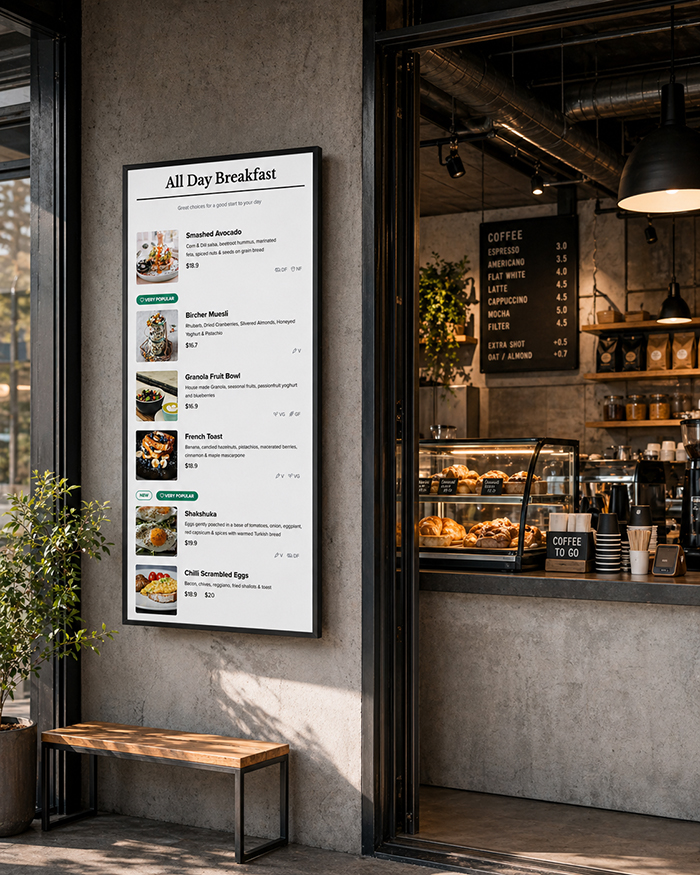
Displaying the full menu is useful when you have one main screen behind the counter. Displaying a single category is useful when you have multiple TVs and want each screen to focus on a different part of the menu.
Configure Transition Times
If your menu has more content than can fit on one screen at once, Happy Menu can move through the content automatically. You can configure how long each section stays on screen before the board transitions to the next section.
This is useful for menus with many categories, long item descriptions, specials, combos, drinks, desserts, or rotating offers.
Configure Refresh Times
Configure how often you want the menu to refresh i.e get updated menu
Get a URL for Each Screen
Each screen you create has its own URL. This is the URL you open on the computer connected to your TV.
For example, you might have one URL for your main counter menu, one URL for your drinks board, and one URL for a breakfast-only screen.
Free 14 Day Trial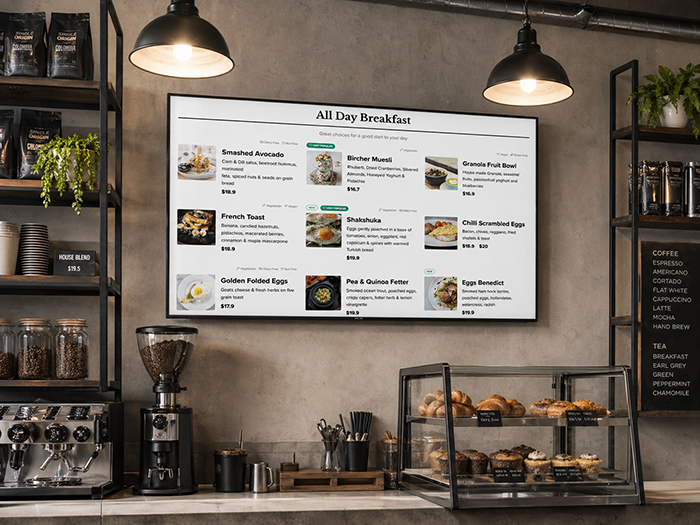
Recommended Hardware
For the most reliable setup, we recommend using hardware that runs Google Chrome properly. The goal is to make your digital menu board as foolproof as possible.
The best setup for most restaurants is a Windows mini PC connected to a TV with an HDMI cable.


1. Windows Mini PC
A Windows mini PC is a small computer that can sit behind your TV or on a shelf near the screen. It runs Windows, installs Chrome, connects to Wi-Fi or Ethernet, and plugs into your TV using HDMI.
This is the most important part of the setup. We recommend a Windows mini PC because it runs the full desktop version of Chrome, which is more reliable than most smart TV browsers.
Recommended search terms on Amazon:
- Beelink Mini S12 Pro Intel N100 Windows mini PC
- GMKtec NucBox G3 Intel N100 mini PC
- Windows 11 mini PC Intel N100 8GB 256GB
- Windows 11 mini PC Intel N100 16GB 500GB
For most restaurants, look for these minimum specs:
- Windows 11
- Intel N100 or better
- 8GB RAM minimum
- 128GB storage minimum
- HDMI output
- Wi-Fi
- Ethernet port if possible
If the price difference is small, choose 16GB RAM and 256GB or 500GB storage. You do not need a gaming PC or expensive workstation. A simple Windows mini PC is enough for displaying your Happy Menu board in Chrome.
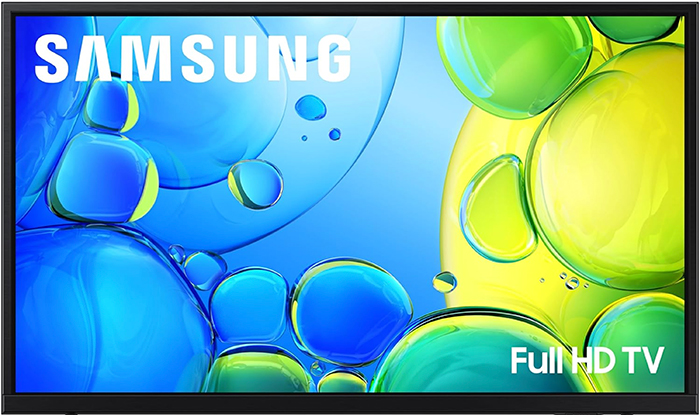
2. TV or Monitor
You can use a regular TV or a commercial display. For many small restaurants, a normal 43-inch, 50-inch, or 55-inch TV is enough.
Recommended search terms on Amazon:
- 43 inch 4K TV HDMI
- 50 inch 4K TV HDMI
- 55 inch 4K TV HDMI
- TCL 43 inch 4K TV
- Samsung 43 inch 4K TV
- LG 43 inch 4K TV
Important: you do not need to use the TV’s built-in browser. The TV is only being used as a screen. The mini PC runs Chrome, and the TV displays the mini PC through HDMI.
For most restaurants, choose a TV based on size, brightness, price, and where it will be mounted. A 43-inch screen is often enough for a small counter area. A 50-inch or 55-inch screen is better if customers need to read the menu from farther away.
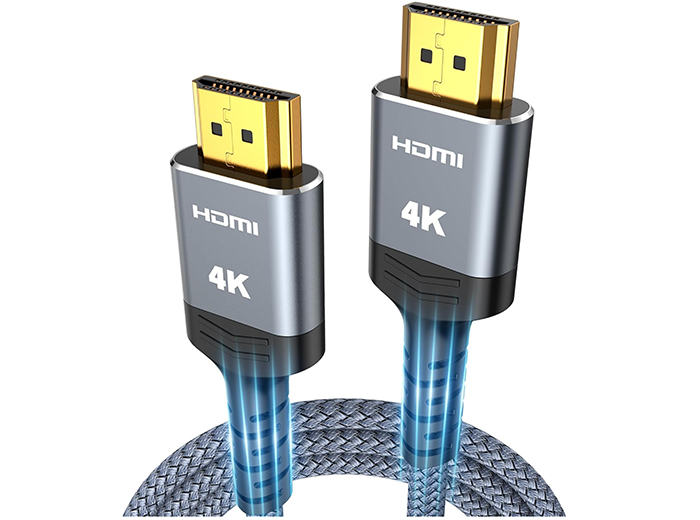
3. HDMI Cable
You need an HDMI cable to connect the mini PC to the TV.
Recommended search terms on Amazon:
- Amazon Basics HDMI cable 10 ft
- 4K HDMI cable 10 ft
- High speed HDMI cable 4K 60Hz
For most setups, a 6-foot or 10-foot HDMI cable is enough. If your mini PC is mounted directly behind the TV, a short cable is better because it keeps the setup tidy.
4. Keyboard and Mouse
You need a keyboard and mouse to set up the screen, enter the Happy Menu URL, connect to Wi-Fi, and put Chrome into fullscreen mode.
The easiest option is a wireless keyboard with a built-in touchpad. This means restaurant staff can control the screen without needing a separate mouse.
Recommended search terms on Amazon:
- Logitech K400 Plus wireless keyboard
- Wireless keyboard with touchpad for Windows
- Mini wireless keyboard touchpad Windows PC
You do not need to leave the keyboard in public view. Once the board is running, keep the keyboard somewhere safe so staff can access it when needed.
5. Internet Connection
Your digital menu board needs internet access so it can load your Happy Menu screen URL and receive updates.
Wi-Fi is usually fine, but Ethernet is more reliable if your screen is important during service. If your restaurant Wi-Fi is weak near the TV, use Ethernet or improve the Wi-Fi signal before relying on the screen during busy periods.
Recommended search terms on Amazon:
- Cat 6 Ethernet cable 25 ft
- Cat 6 Ethernet cable 50 ft
- Wi-Fi range extender
6. Optional TV Wall Mount
If your screen will be mounted behind the counter or above a service area, you may need a wall mount.
Recommended search terms on Amazon:
- TV wall mount 43 inch
- TV wall mount 50 inch
- Full motion TV wall mount
- Low profile TV wall mount
Before buying a wall mount, check the TV size, weight, and VESA mounting pattern. If you are not comfortable installing the mount safely, use a professional installer.
Get Started
Recommended Digital Menu Board Bundle
For most restaurants, this is the simplest recommended bundle:
- 1 x 43-inch, 50-inch, or 55-inch TV
- 1 x Windows mini PC with Intel N100 or better
- 1 x HDMI cable
- 1 x wireless keyboard with touchpad
- 1 x Ethernet cable if you want the most stable connection
- 1 x TV wall mount if the screen will be mounted
This setup is simple, affordable, and easy to support because it uses normal computer hardware and Google Chrome.
What We Do Not Recommend
To keep the setup simple, we recommend avoiding hardware that does not run the full desktop version of Chrome.
Smart TV Browsers
Some smart TVs include a built-in web browser, but we do not recommend using it as your main digital menu board setup.
Smart TV browsers can be slow, awkward to control, difficult to keep fullscreen, and inconsistent between TV brands. They may work for testing, but they are not the most reliable option for daily restaurant use.
Fire TV Sticks and Streaming Devices
Streaming devices are designed for watching video apps, not for running a restaurant menu board in desktop Chrome. They may require workarounds and can be harder for staff to manage.
For a foolproof setup, use a Windows mini PC instead.
Android TV Boxes
Some Android boxes can display web pages, but they often use mobile browsers or limited apps. This can create issues with fullscreen display, performance, and remote control.
Happy Menu’s recommended setup is a Windows mini PC running Google Chrome.
How to Set Up Your Happy Menu Digital Menu Board
Once you have your hardware, setting up your digital menu board is straightforward.
Step 1: Create a Screen in Happy Menu
Log in to your Happy Menu dashboard and go to your digital menu board settings.
Add a new screen. Give it a name that helps you remember where it will be used, such as Main Counter Board, Drinks Screen, Specials Screen, Breakfast Board, or Dessert Board.
If you are using one TV, you may only need one screen. If you are using multiple TVs, create a separate screen for each display.
Step 2: Choose What the Screen Displays
Choose whether the screen should display your full menu or one selected category.
Use the full menu option if you want one board to rotate through your menu. Use the category option if you want a screen dedicated to one section, such as burgers, pizza, coffee, cocktails, desserts, or lunch specials.
Step 3: Configure Transition Times
Set how long each section should stay on screen before moving to the next section.
Shorter transition times can work well for small menus and fast-moving boards. Longer transition times are better when customers need more time to read item descriptions, prices, modifiers, or specials.
As a general starting point, use slower transitions than you think you need. Customers should never feel rushed while reading your menu.
Step 4: Copy the Screen URL
After the screen is created, Happy Menu will give you a URL for that screen.
This URL is what you will open on the mini PC connected to your TV.
If you have multiple screens, make sure you copy the correct URL for each TV.
Step 5: Connect the Mini PC to the TV
Plug the mini PC into power. Connect it to the TV using an HDMI cable. Turn on the TV and select the correct HDMI input.
You should now see the Windows desktop on the TV.
Step 6: Connect to the Internet
Connect the mini PC to your restaurant internet using Wi-Fi or Ethernet.
If the screen is important for daily service, Ethernet is the better option because it is usually more stable than Wi-Fi.
Step 7: Install or Open Google Chrome
Open Google Chrome on the mini PC. If Chrome is not installed, install it first.
Once Chrome is open, paste your Happy Menu screen URL into the address bar and load the page.
Step 8: Put Chrome Into Fullscreen Mode
On Windows, press F11 to put Chrome into fullscreen mode.
This hides the browser toolbar and allows your Happy Menu board to fill the screen.
To exit fullscreen later, press F11 again.
Step 9: Turn Off Sleep Mode
Before using the board during service, make sure the mini PC does not go to sleep.
In Windows, check your power settings and turn off sleep while the device is plugged in. You should also turn off screen savers and automatic display shutoff during business hours.
This prevents the screen from going blank during service.
Step 10: Test It Before Service
Before relying on the screen during a busy shift, test the setup when the restaurant is quiet.
Check that the text is readable from where customers stand, the menu transitions are not too fast, the prices are correct, and the screen stays awake.
Free Trial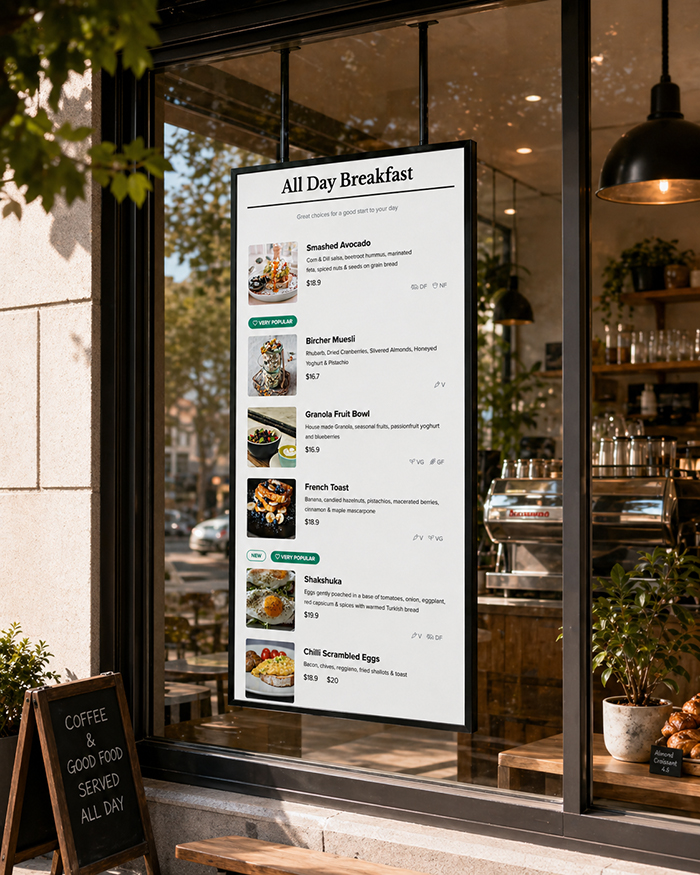
How to Use Multiple Digital Menu Boards
If your restaurant has more than one TV, you can create a more polished setup by giving each screen a specific job.
For example:
- Screen 1: Burgers and mains
- Screen 2: Sides, desserts, and drinks
- Screen 3: Specials and limited-time offers
- Screen 4: Breakfast or lunch menu
Each screen can have its own Happy Menu URL. Open the correct URL on each mini PC or display setup.
If you want each TV to show something different, the simplest setup is one mini PC per TV. If you have a more technical setup, you may be able to run multiple screens from one computer, but most restaurants should keep it simple.
Best Layout Ideas for Restaurants
A good digital menu board should be easy to read quickly. Customers are often standing in line, deciding what to order, and trying not to hold up the queue.
Keep Item Names Clear
Make sure item names are short and easy to scan. Long, complicated names can be hard to read on a screen, especially from a distance.
Use Descriptions Carefully
Descriptions are useful, but they should not make the board feel crowded. Use descriptions for items where ingredients, flavor, or dietary details help the customer choose.
Do Not Rotate Too Quickly
If the screen changes too quickly, customers may miss items or feel frustrated. Give each screen enough time to be read comfortably.
Use Separate Screens for Big Menus
If your menu is large, do not try to force everything onto one screen at once. Use multiple screens or category-specific boards so the layout stays readable.
Put Specials on Their Own Screen
Specials, combos, limited-time items, happy hour offers, and seasonal promotions often perform better when they have room to stand out.
Digital Menu Board Checklist
Use this checklist before going live:
- TV is mounted or positioned safely
- Mini PC is connected to the TV with HDMI
- Mini PC is connected to power
- Internet is connected
- Chrome is installed
- Happy Menu screen URL opens correctly
- Chrome is in fullscreen mode
- Windows sleep mode is turned off
- Screen saver is turned off
- Menu text is readable from the customer area
- Prices and categories are correct
- Transitions are slow enough to read
- Staff know where the keyboard is stored
Troubleshooting
The Menu Board Is Not Filling the Screen
Make sure Chrome is in fullscreen mode. On Windows, press F11.
Also check the TV display settings. Look for settings such as aspect ratio, screen fit, full, just scan, or 16:9.
The Screen Goes Blank
Check the Windows power settings and make sure the mini PC is not going to sleep. Also check the TV settings for sleep timer, energy saving mode, and auto power off.
The Menu Is Not Updating
Check that the mini PC is connected to the internet. Refresh the Chrome page and confirm you are using the correct Happy Menu screen URL.
The Text Is Too Small
Use a larger TV, reduce the amount of content shown at once, or create separate screens for different categories. Customers should be able to read your menu comfortably from where they order.
The Wi-Fi Keeps Dropping Out
If possible, use an Ethernet cable instead of Wi-Fi. A wired connection is usually more reliable for a screen that stays on all day.
FAQ
What is the easiest way to set up a digital menu board?
The easiest setup is a TV connected to a Windows mini PC using HDMI. Open your Happy Menu screen URL in Google Chrome, press F11 for fullscreen mode, and leave it running during service.
Do I need special digital signage hardware?
No. With Happy Menu, you do not need complicated signage hardware. A normal TV, a Windows mini PC, an HDMI cable, and Chrome are enough for most restaurants.
Can I use a smart TV browser?
We do not recommend using a smart TV browser as your main setup. Smart TV browsers can be slow, limited, and inconsistent. For the most reliable setup, use a Windows mini PC running Google Chrome.
Can I use a Fire TV Stick?
We recommend using a Windows mini PC instead. Fire TV Sticks and similar streaming devices are designed for streaming apps, not for running a restaurant menu board in desktop Chrome.
What size TV should I use for a restaurant menu board?
A 43-inch TV can work well for a small counter area. A 50-inch or 55-inch TV is better if customers need to read the menu from farther away. Larger restaurants may use multiple screens instead of trying to fit everything on one display.
Can I show different menus on different screens?
Yes. In Happy Menu, you can create different screens with different configurations. Each screen has its own URL, so you can show the full menu on one TV, drinks on another TV, and specials on another.
Can I show only one category on a screen?
Yes. You can configure a screen to show the full menu or a specific category. This is useful for restaurants with multiple boards, such as one for food, one for drinks, and one for specials.
Does the menu board update when I change my Happy Menu?
Your Happy Menu board is connected to your Happy Menu screen URL. When your menu is updated, the board can display the latest version without needing to redesign a static image or print a new sign.
Try It Free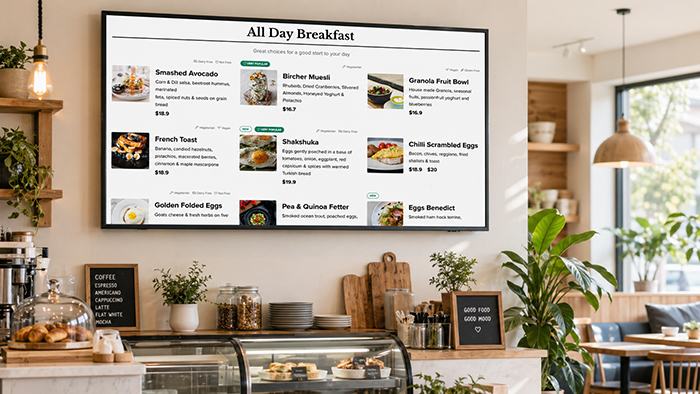
Turn Any TV Into a Digital Menu Board With Happy Menu
Happy Menu makes digital menu boards simple for restaurants. Create a screen in your dashboard, choose what it displays, configure transition times, and open the screen URL in Chrome on a TV-connected mini PC.
No complicated signage software. No manual design work. No smart TV browser headaches. Just your menu, beautifully displayed on your restaurant screen.
If you already use Happy Menu, you can create your digital menu board screen from your dashboard and start testing it on any TV connected to a Chrome-compatible device.
